How to Share report in Bulk?
Introduction
This document contains information on the business scenario of sharing the same report with multiple users in Bulk using report bursting.
Report Bursting will be used in a condition when multiple reports are required to be generated and shared with relevant users at a specific predefined time period.
Prerequisites
Top 5 Customers Report
Customer Dataset
Download Dependency file from Here
Upload CSV file in the Shared resource section and Upload Report in Report section.
Upload Dataset file in Dataset section.
Objective
The objective of this document is to show step-by-step information to Generate and share the report in Bulk (to many users).
Use case
Let's assume In an XYZ Organization, reporting team has some reports that need to be sent to every employee. There are 1000 Employees in this company. The team has to share the same report to all 1000 users every week or Month. It is easy to generate and share reports For 1 or 2 employees. But for 1000 employees it is very difficult and time-consuming. With Report Bursting we can share the same report with 1000 employees in one click using Report Bursting functionality. Also, you can automate this process of generation and share by scheduling options available in AIV.
The report we are using has details of Top customers. To share the report with employees, we need to fetch all users information in a dataset. here we have the Customers dataset which has user names and Email id data.
Steps to Follow
Follow the below steps to perform Bulk report sharing using report bursting;
Click on Hamburger Icon.
Go to the Document section and click on Report Bursting, As shown in the figure below:
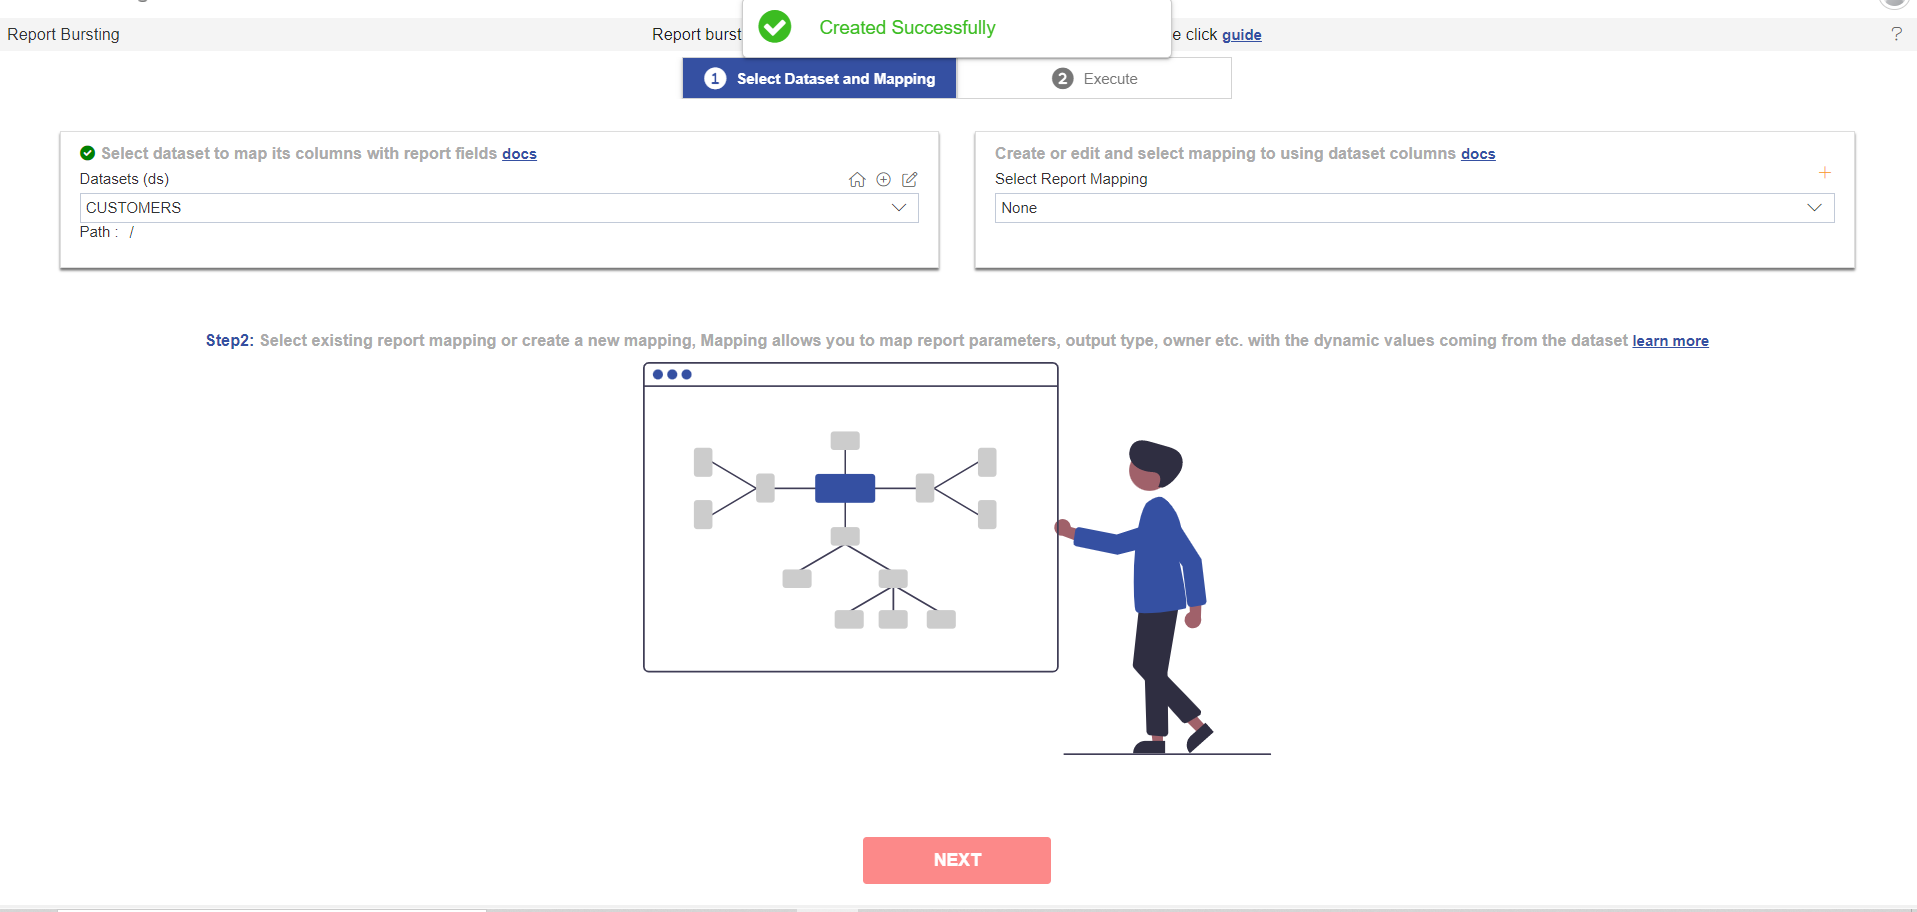
You can see the report bursting home page, which asks you to select dataset and Mapping from the dropdown.

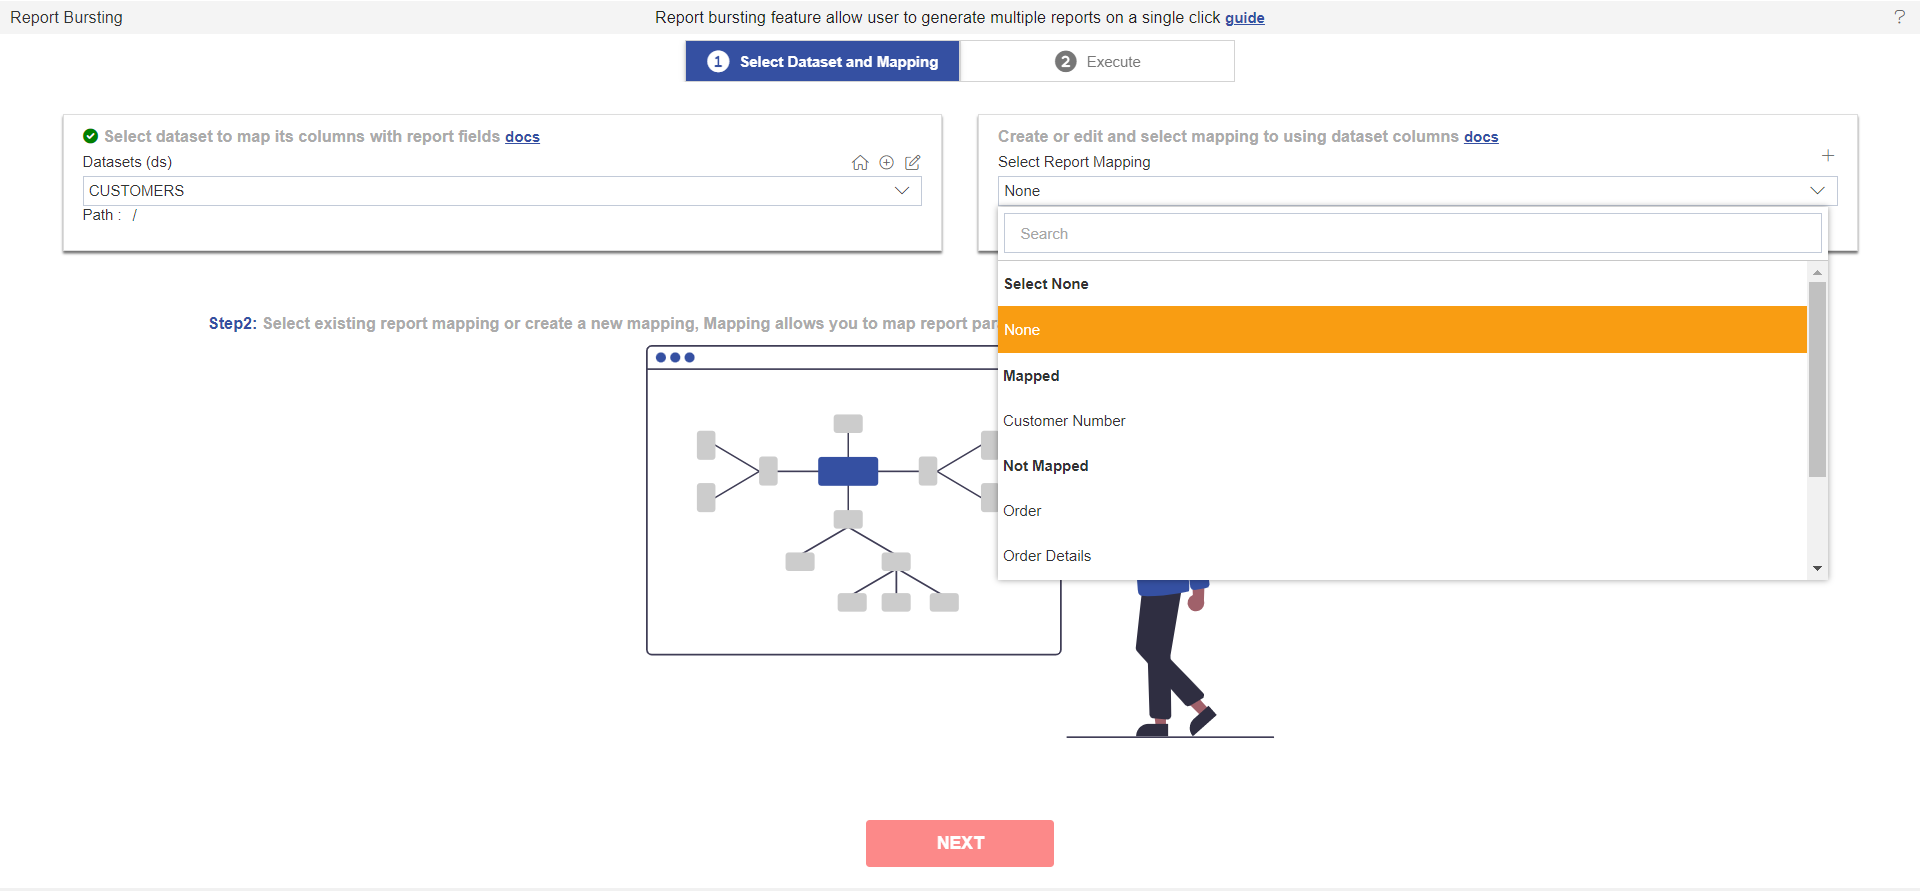
Select Dataset
The dataset should be selected based on the type of report selected. Here we have will select a dataset that has a list of users to whom we want to send the report.
You can create or edit the dataset from here as well, you can see create and edit icon available at the top right side of the dataset element.
Dataset: Customers (Create or Select the dataset based on Report parameter, make sure dataset contains unique values)
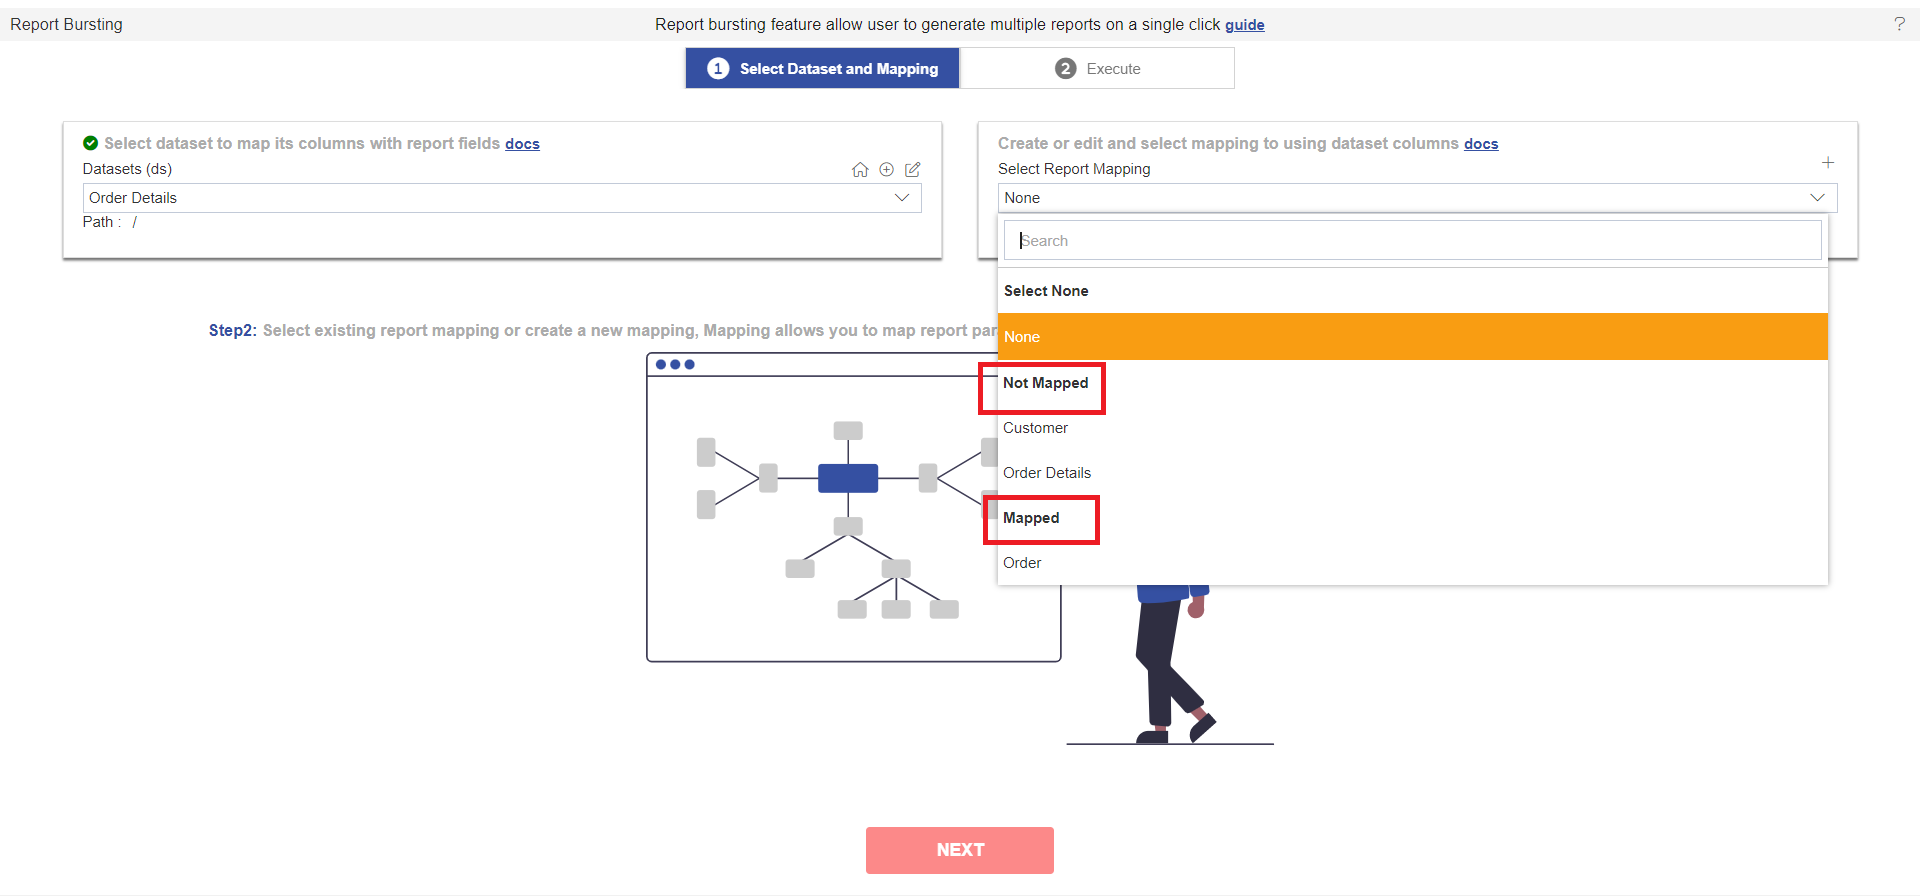
Select / Create Mapping
If you are doing it the first time and there will be no mapping created, select report mapping dropdown will show no data. But once the mapping is created or you have existing mapping you can see mappings in the select report mapping dropdown.
In case you have some mappings created, when you select a dataset you will see all available mapping lists under select report mapping, and also you will see all mappings are grouped by Mapped and Not Mapped Keywords.
If you have created mappings with the selected dataset earlier then you can see your mapping in the Mapped list and other mappings are grouped in Not Mapped List as shown below screenshot;
To create a new mapping with a selected Dataset, click on the + icon and It will display the following page.
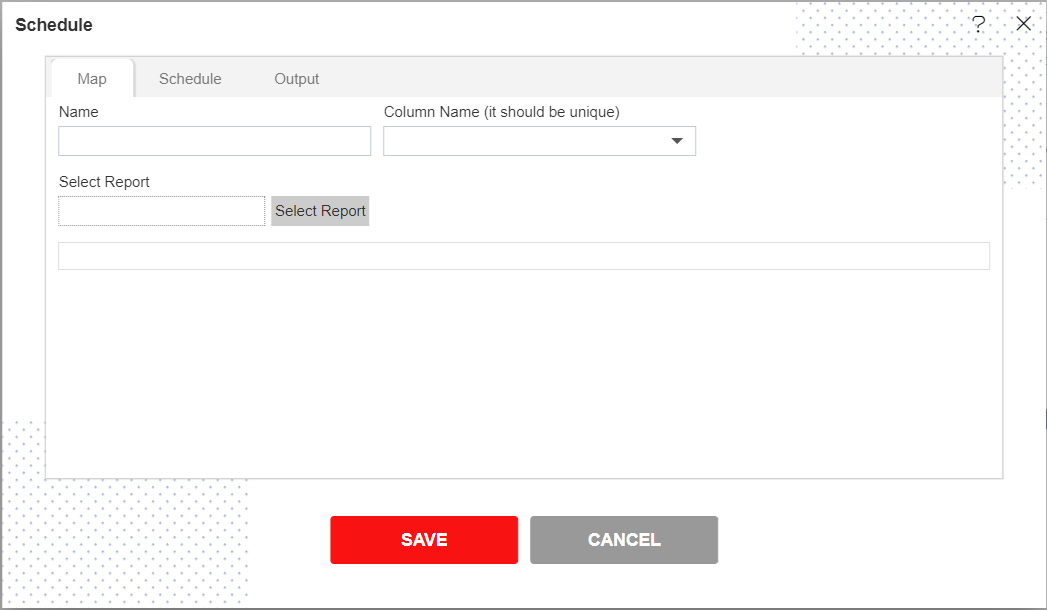
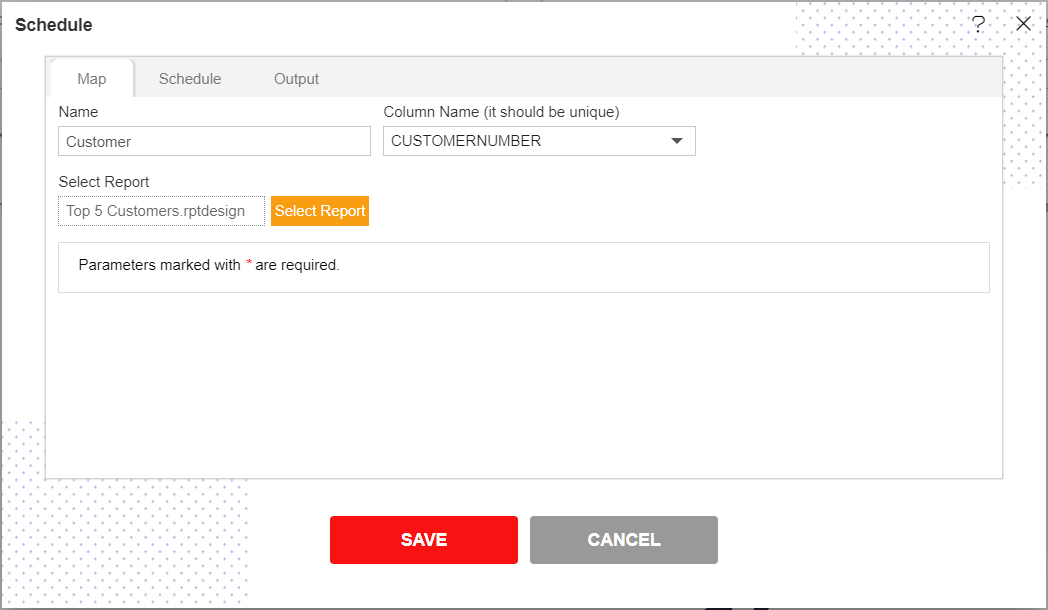
Enter the following details on the Schedule Page.
Name: Customer [ Add name as per your requirements]
Column Name: CustomerNumber [ It should be Unique ]
- Your report output name will be Customer number in this case
Select Report: Top 5 Customers.rptdesign [ User can select a report based on your requirements ]
Fill above details, as shown in figure below:
Click on the Output Tab.
Enter the following details in Output Tab.
Name: Customer [ Add name as per your requirements]
Select CustomerNumber column in dropdown List [ select Unique column which you have selected in column name]
Suffix: yyyyddMM_HH-mm-ss [ optional ]
Format: Pdf [ Select the format in which you want to generate the output from the dropdown menu ]
Path: /Output/Temp/ [ specify the delivery path on your computer where the copy of executed reports will be stored ]
Email: Select column where we have Email data from dataset dropdown. [Click on the Email checkbox and you will see this dropdown as shown in the image below]
Email Function will not work if you are scheduling bursting in Right Now manner. It will work with once and recurring scheduling frequency options in Asynchronous. It will not work with Synchronous type.
Fill above details, as shown in figure below:
Click on the Save button and it will display the message Created Successfully, as shown in the figure below:
In Select Report Mapping Dropdown you can see mapping just we created in Not Mapped list, select Customers Mapping here.
It will display all the Customer's dataset details in grid view in the empty pane, here you have to select the number of customers from the list for whom you want to generate and share the report.
In this example I am selecting five customers Customer numbers, as shown in the figure below:
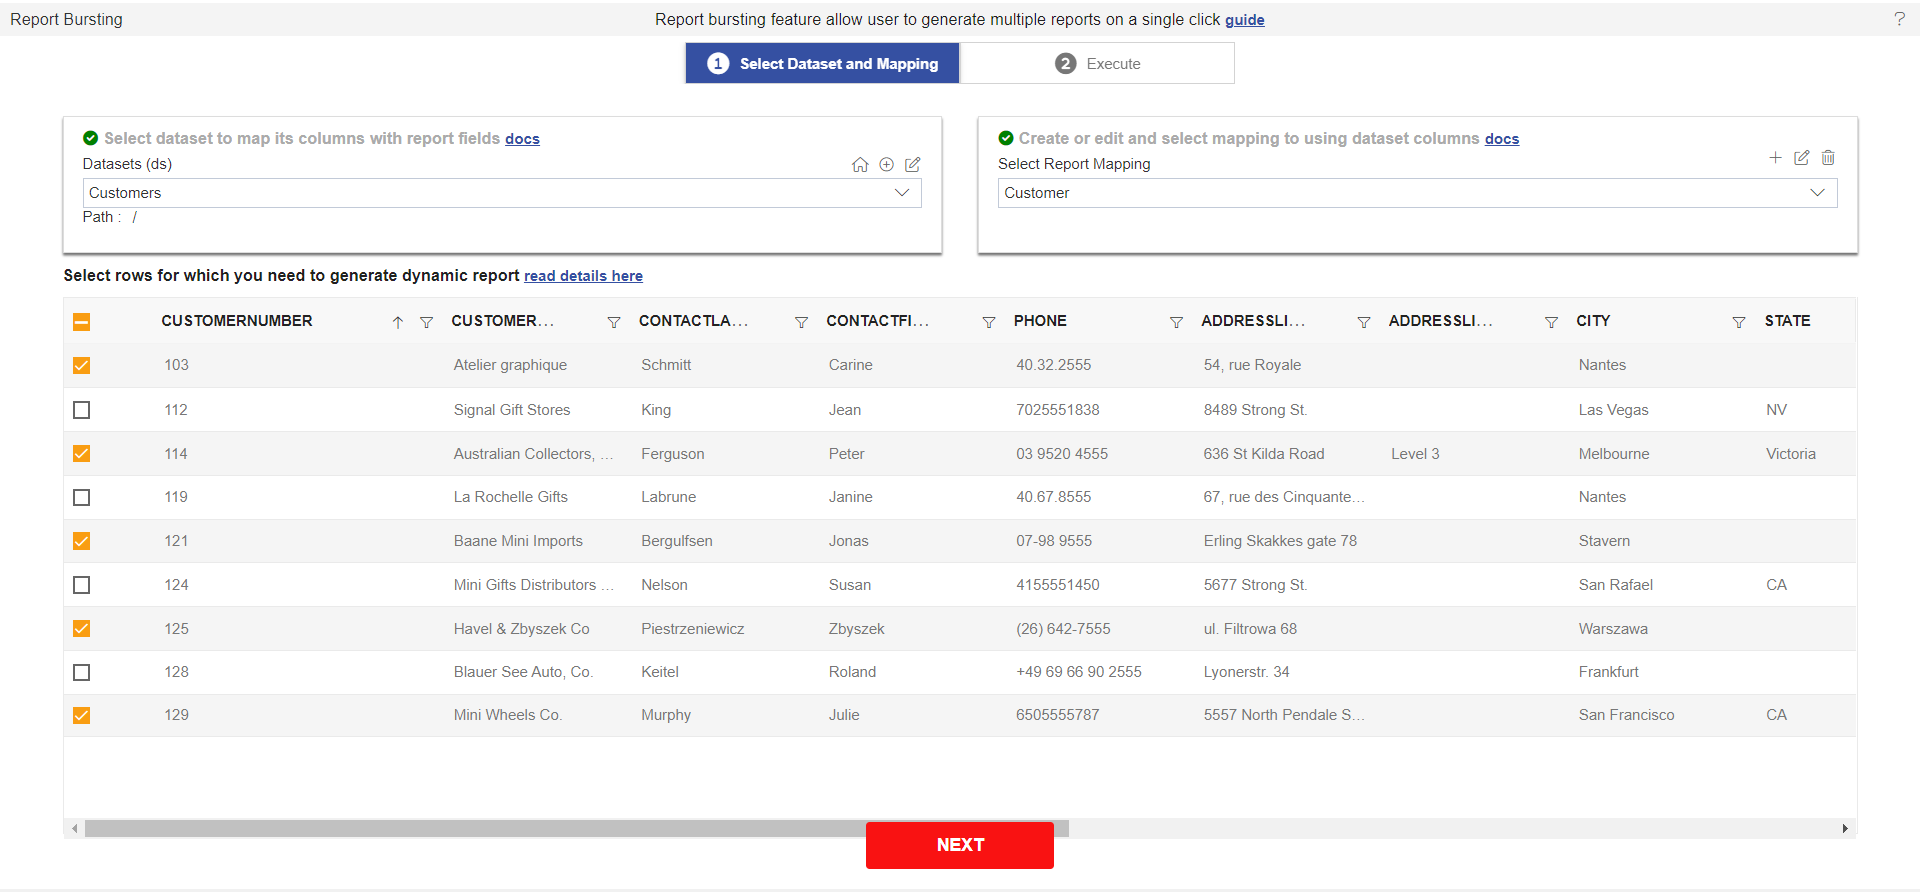
Click on the Next Button. It will take you to Step 2.
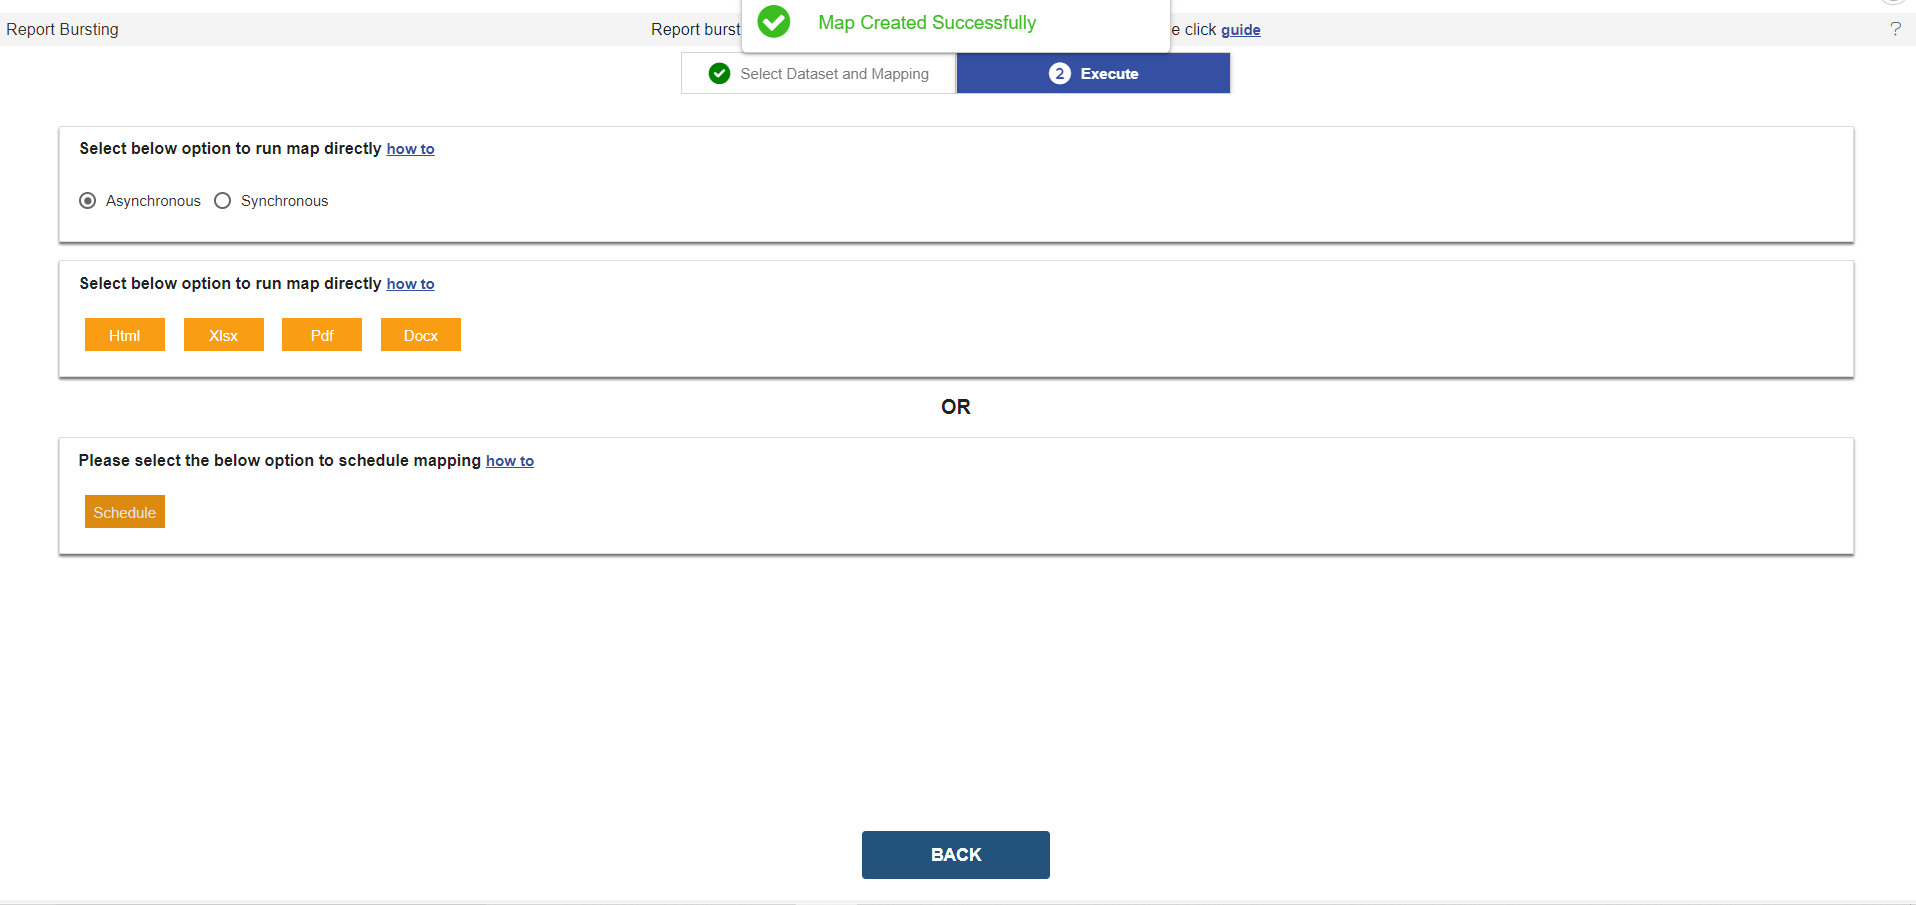
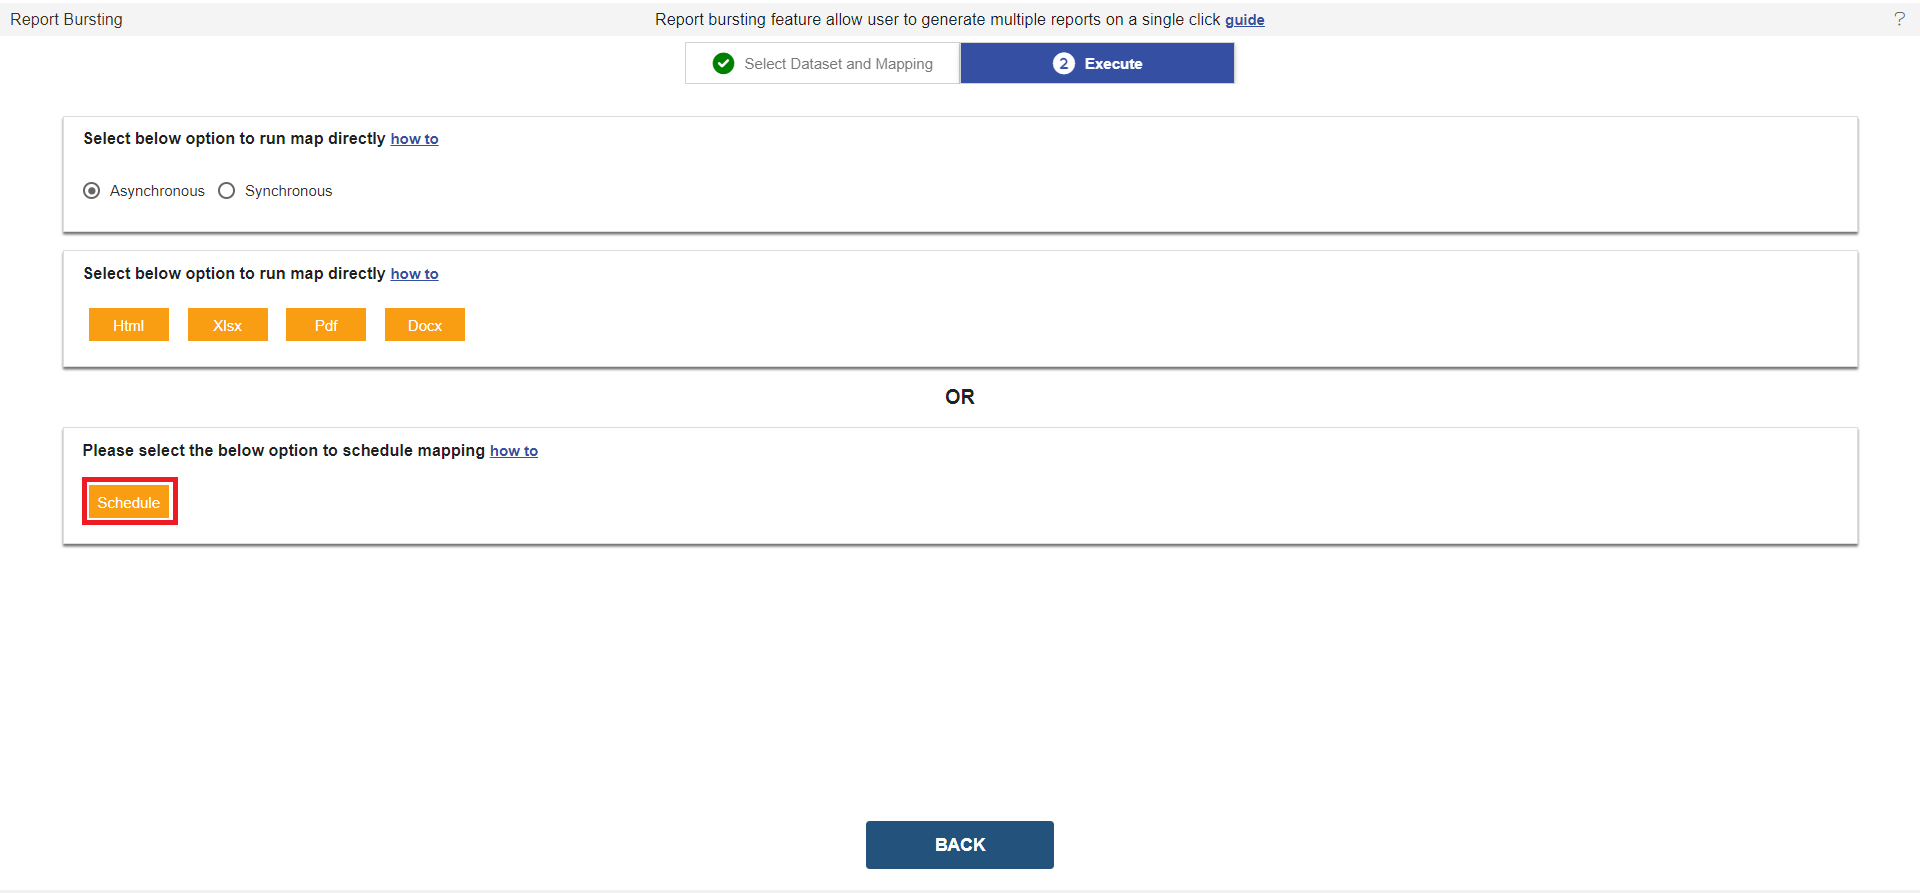
In Execute Page There are 2 options to run this mapping,
1. Asynchronous
In This Type of Report Bursting, the User has the Option to run this bursting in Right now and in a recurring manner. There are 4 output options to run bursting in case you want to run in Right now mode and these are HTML, Xlsx, PDF, and Docx. To run bursting in right now manner, just click on any of the 4 options given here, and Bursting will be executed immediately.
But if you want to run this report bursting in a recurring manner, select the Schedule option and you will see the scheduler window will be displayed. you can set the time of schedule from here.
You can check the list of reports generated in the request section as well in the output>Temp folder of the report section.
You can also schedule the frequency of mapping by using the schedule button given below.
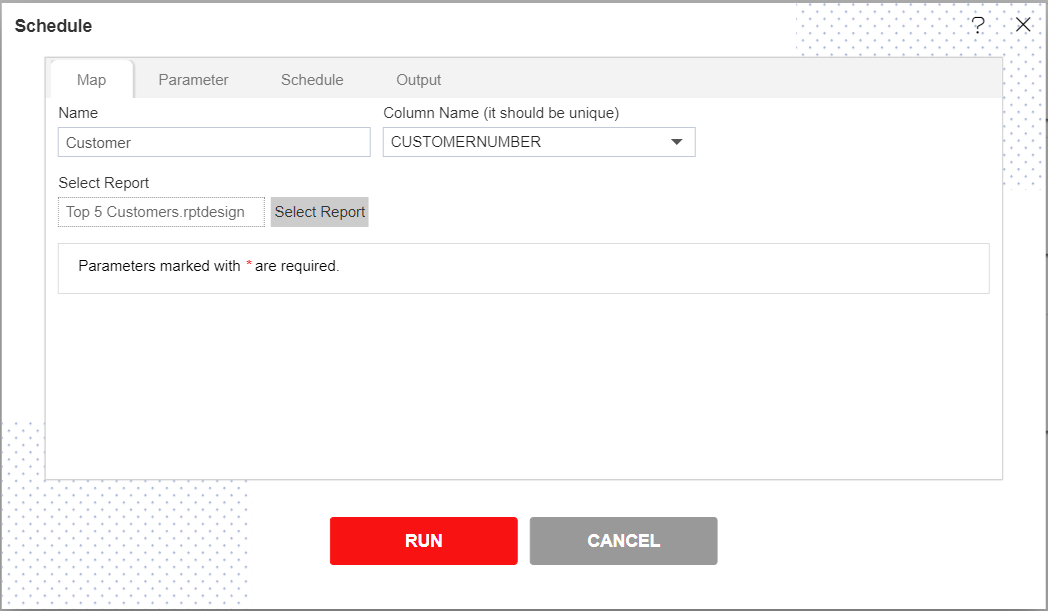
Click on the schedule button and Enter the following details in Map Tab, as shown in the figure below:
Name: Customernumber
Column Name: Customer Number
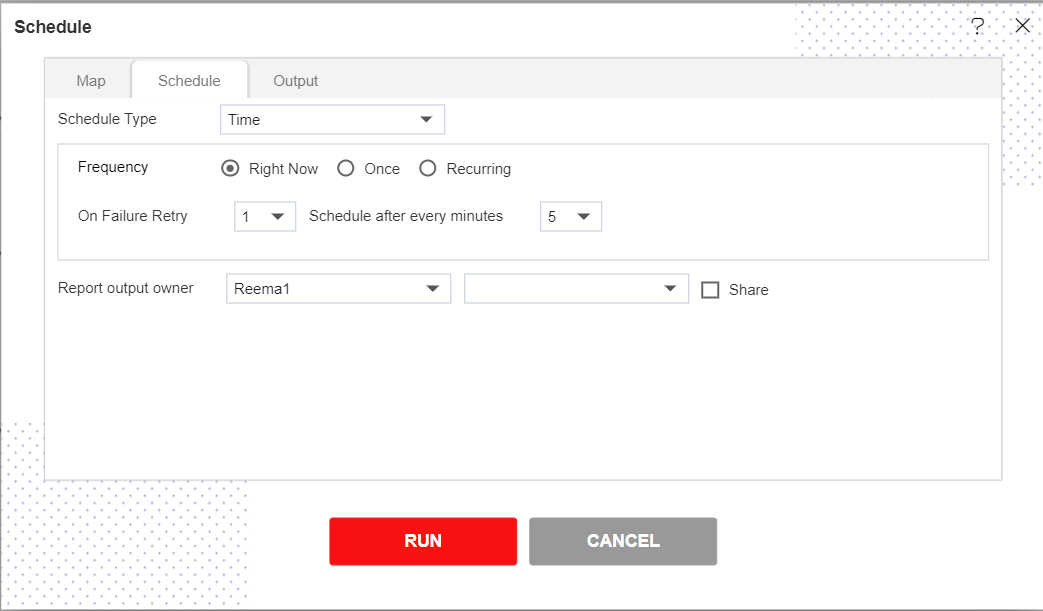
In the Schedule Tab, you can set the frequency as per your requirements.
Enter the following details in the Schedule Tab, as shown in the figure below:
Schedule Type: Time
Frequency: Right Now
Click on Run Button and wait till the success message.
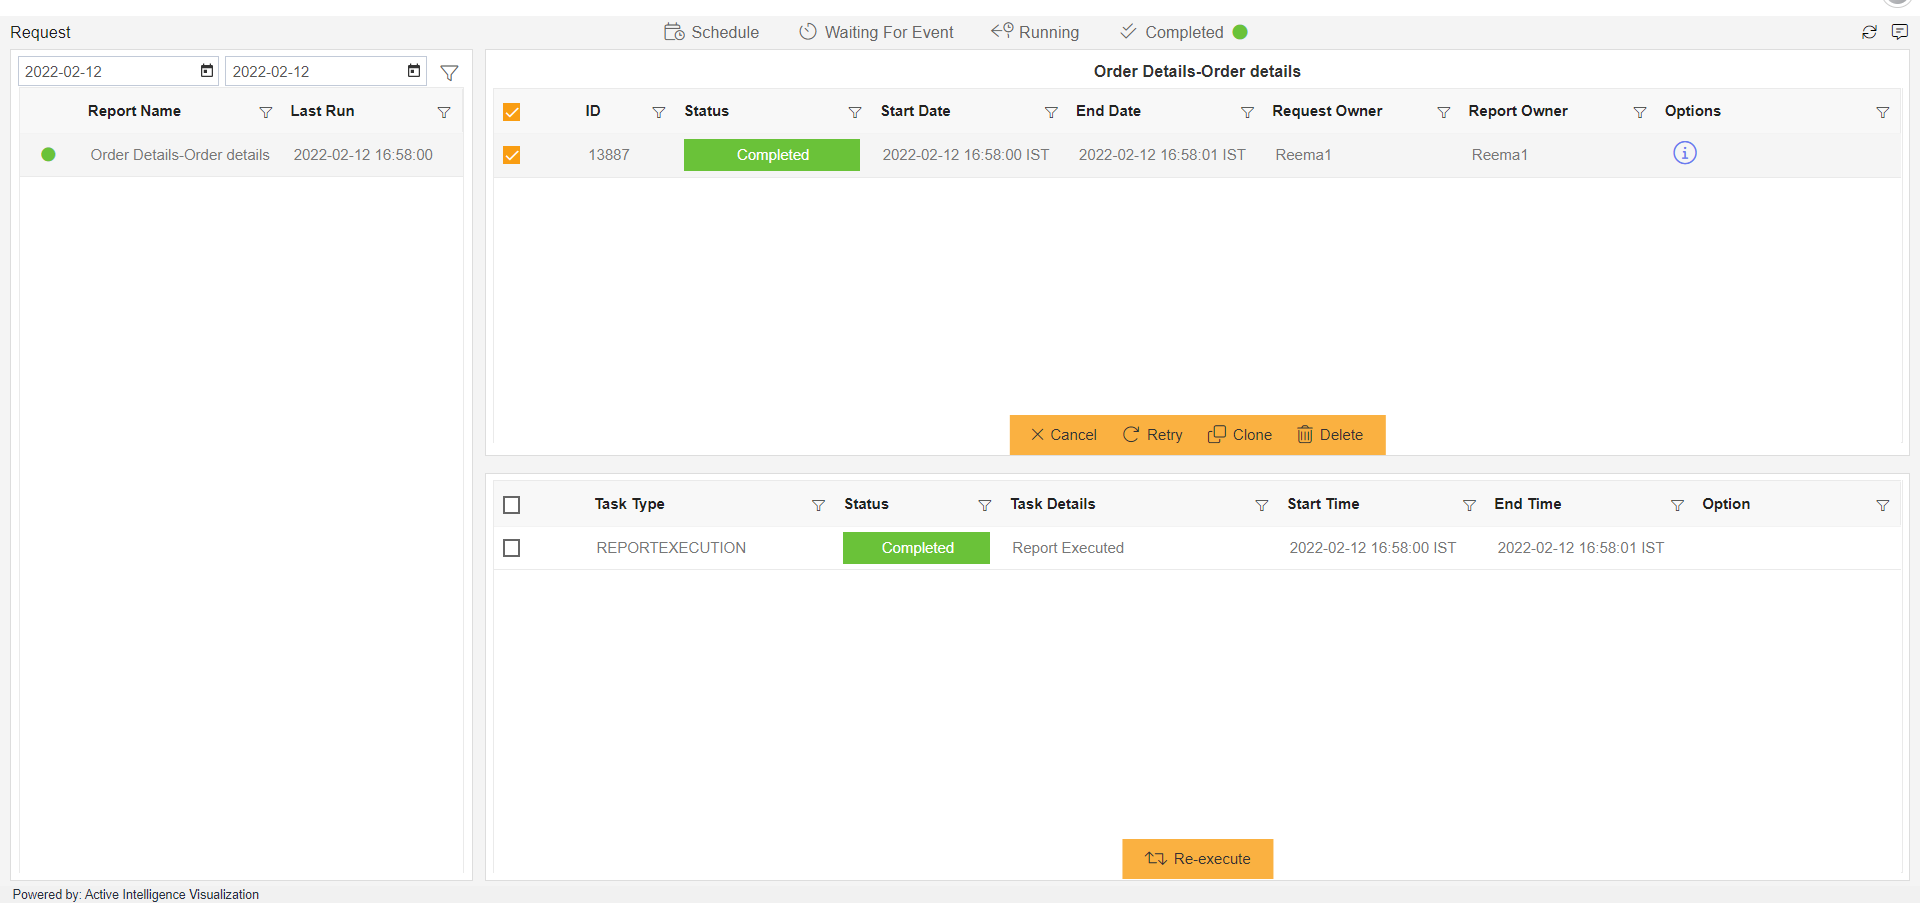
Click on the Hamburger button and Expand Request Section, Click on the Request option over there.
Here you can see the Schedule request, as shown in the figure below:
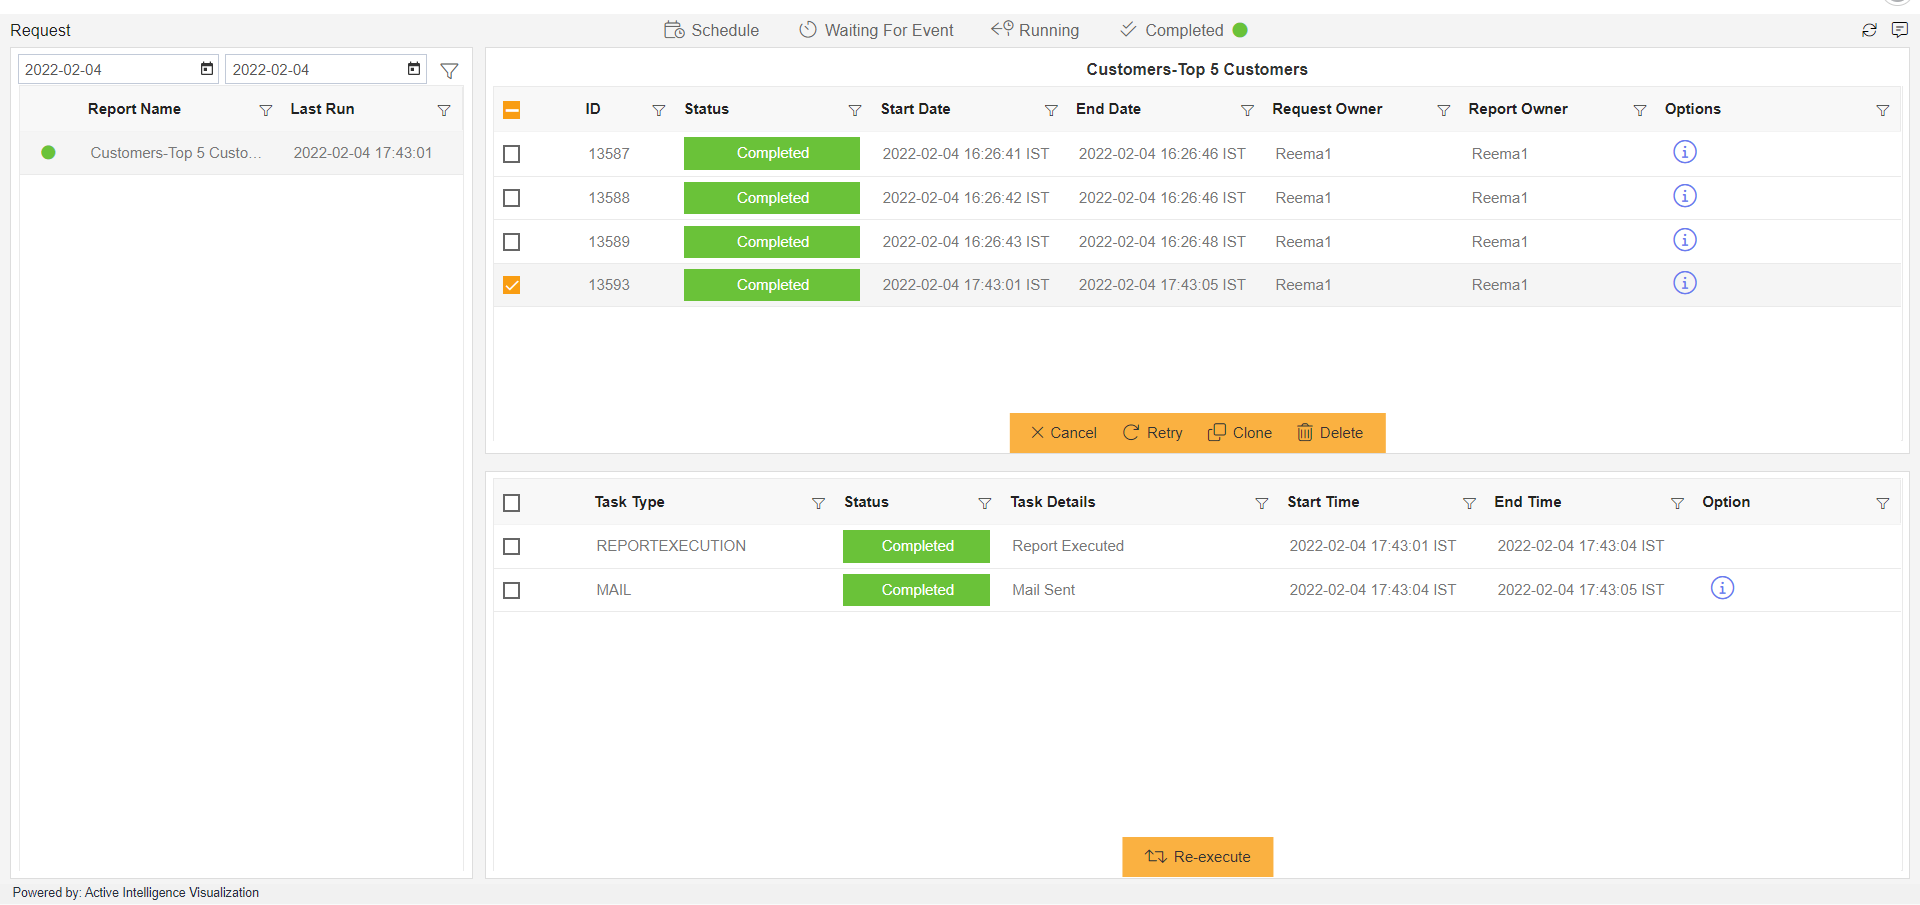
Check Request Schedule successfully.
To check Report Output, click on the Hamberger icon and expand the Documents section, select the report option. in that go to Output>>Temp folder.
In the Temp folder, you can see the reports which are scheduled successfully.
Double click on that report to open it, as shown in the figure below:
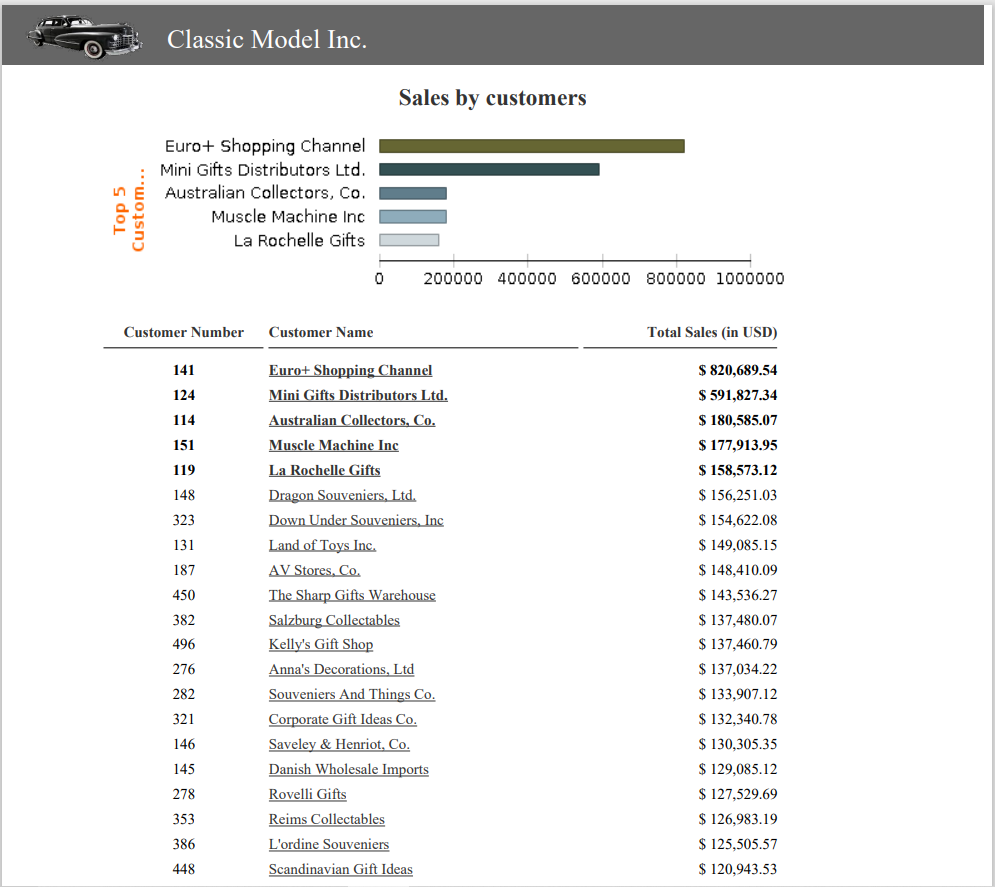
The name of the report will be the Column name that you have applied while creating the mapping, in this case, report names will be a customer number
2. Synchronous
Select the Synchronous radio button and select the format in which you want to generate the output here we are selecting the pdf format. By clicking on the PDF button, the report bursting will run straight away in the right now manner. you can see the status of this request in the request section.
While running report bursting in right now manner, after successful execution of your request, All reports will be zipped and downloaded in your machine locally. you can extract them and check reports locally.